
A new year often means new beginnings — and for many, that includes a new job. Whether you’re stepping into a new role or welcoming someone who is, here are a few reminders to make the transition smoother for everyone involved.

If You’re Newly Hired, Remember This:

Know Thyself: Be ready to answer the basics — where you’re from, what you do, and what brought you here. Keep it brief but engaging. Introductions matter, and a thoughtful one sets the right tone.

Mind Your Business: Set boundaries early. Know how personal you want to be at work, and what you’re willing to give beyond business hours. Steer clear of gossip, cliques, and conflict. Listening more than talking often serves you better in the long run.

Do Your Research — Then Ask Questions: Learn what you can about the company and your new role, but don’t assume research makes you an expert. Ask questions often. The more you engage, the faster you grow.

Pay Attention to Norms: Beyond formal procedures, every workplace has its own culture. Observe how coworkers interact, what’s expected socially, and what’s not. And avoid saying, “At my last job, we did it this way…”

Relax: Preparation matters — but so does mindset. Get rest, stay open, and give yourself the grace to adjust. You’ve got this.

If You’re Welcoming a New Hire, Remember This:

Introduce Yourself: Don’t wait for someone else to make the first move. A simple introduction can go a long way toward helping a new team member feel welcome and supported.

Show Up & Follow Up: Check in after their first day or week. Ask how they’re settling in and if they need anything. Small moments of outreach build trust and credibility.

Remember What It Was Like: You were new once, too. Be patient with questions, and generous with your time. Transitions are rarely easy.

Watch, But Don’t Hover: Keep an eye out, but avoid micromanaging — especially if it’s not your role. Time and experience are great teachers. Let people learn.

Give Praise: Everyone wants to feel seen. Whether it’s a thank you, a smile, or a compliment, small acts of recognition build confidence and strengthen teams.


FlexTrades provides labor solutions to American manufacturers. That’s what we do in a nutshell — and we take the solution part seriously. We ask the right questions to deliver the right results, and this blog is one way we share insights and answers to the questions we hear most often.

One of the most common?

Why would someone choose travel work if they’re good enough to keep a job at home?

It’s a fair question — and the truth is, there isn’t one single answer. FlexTrades isn’t the only company that offers travel-based employment, but we are proud of the many tradespeople who choose this path with us. Every skilled technician who travels has their own reason for doing so, and many prefer it to local work. Let’s look at the three most common reasons why.

1. The Money

For many, employment starts with income — and traveling for work can open the door to better pay.

The same job doesn’t always pay the same wage everywhere. Geographic location, industry, and company all affect base rates. So if someone wants to earn more than what their local market allows, they look beyond it. Traveling becomes a smart way to follow the money, earn it on the road, and bring it home.

2. The Work Itself

Some people travel because they want to do more of what they love.

Not all work is the same, even within the same trade. A machinist who loves aerospace work but lives in an area dominated by oil and gas jobs might find the right fit out of state. FlexTrades helps connect skilled tradespeople with projects that match their experience and interest — not just their location.

3. The Travel

Yes, the travel itself is a draw.

Most people work so they can afford to travel. But what if you could flip that and get paid to travel? That’s exactly what many of our technicians do — exploring new cities, states, and regions while staying productive in their careers. It’s a great way to see the country without putting life on pause.

Want to Learn More?

Check out one of our Technician Spotlights, like this feature on Brian B., a FlexTrades machinist. If you have a question for our team, send it to writingteam@flextrades.com — we’d love to feature it in an upcoming FAQ.

You can also watch our Road Warrior webinar to get a deeper look at what it’s like to be a traveling technician with FlexTrades. 

Welcome to another installment of How It’s Made with FlexTrades, where we break down complex manufacturing processes in clear, digestible ways. In this edition, we’re answering a timely and important question:

How are vaccines made?

Let’s start with the basics.

What Is a Vaccine and How Does It Work?

At its core, a vaccine contains a version of the virus or bacteria it’s designed to protect against. This might sound counterintuitive, but it’s all about training your immune system to respond.

Here’s how:

  • Inactivated or killed vaccines: These vaccines contain a virus that has been fully inactivated (killed), such as in the polio or rabies vaccines.
  • Live attenuated vaccines: These contain a weakened version of the virus that’s strong enough to stimulate the immune system but not strong enough to make you sick. Examples include chickenpox, measles, and hepatitis B.

In both types, the goal is the same: introduce an antigen that prompts your immune system to produce antibodies—specialized proteins designed to recognize and neutralize threats. That way, if you’re ever exposed to the real virus, your body already knows how to fight it.

Step-by-Step: How Are Vaccines Made?

Making a vaccine is a highly controlled, multi-phase process that starts with science and ends with life-saving solutions in a syringe.

Step 1: Grow the Virus or Bacteria

Vaccines begin in the lab where scientists grow large quantities of the virus or bacteria.

  • Viruses are typically grown in cell cultures (often derived from chicken embryos).
  • Bacteria are grown in bioreactors, large tanks filled with nutrient-rich growth mediums like amino acids, carbohydrates, minerals, and proteins.

The goal in this stage is replication—producing enough of the virus or bacteria to create a strong immune response.

Step 2: Harvest and Isolate the Antigen

Once replication is complete, the next step is to extract the antigen (the part that triggers the immune system).

  • Scientists release the antigen from the cell or growth medium.
  • Then, they purify it using methods like chromatography or ultra-filtration to remove impurities and isolate only what’s needed.

Step 3: Formulate the Vaccine

Next, the purified antigen is mixed with additional ingredients to form the vaccine:

  • Adjuvants: Help boost the immune response.
  • Stabilizers: Maintain shelf life and preserve potency.
  • Preservatives: Allow multi-dose use and prevent contamination.

All of these components are blended in large vessels under strict quality control.

Step 4: Fill and Finish

Once the formula is ready:

  • The vaccine is dispensed into vials or prefilled syringes.
  • Each is sealed with sterile closures, labeled, and sometimes freeze-dried for long-term storage.

This is the version you eventually see at clinics, pharmacies, and hospitals.

More Than Manufacturing: The Bigger Picture

While the physical creation of a vaccine is highly technical, it’s only one part of a long process. From initial discovery to regulatory approval, vaccine development can take 15 to 20 years and includes:

  • Laboratory research
  • Pre-clinical studies
  • Multiple phases of clinical trials
  • Rigorous reviews by agencies like the FDA

Want to dive deeper into that process? Here’s a breakdown of the testing and regulation steps required before a vaccine ever hits the market. 

At FlexTrades, we deliver workforce solutions to American manufacturers. That means solving complex problems, answering tough questions, and helping our clients and technicians understand the tools of the trade. One question that comes up more often than you’d think:

What’s the difference between a VTL and a VBM?

Let’s break it down.

VTL vs. VBM: A Simple Answer to a Confusing Question

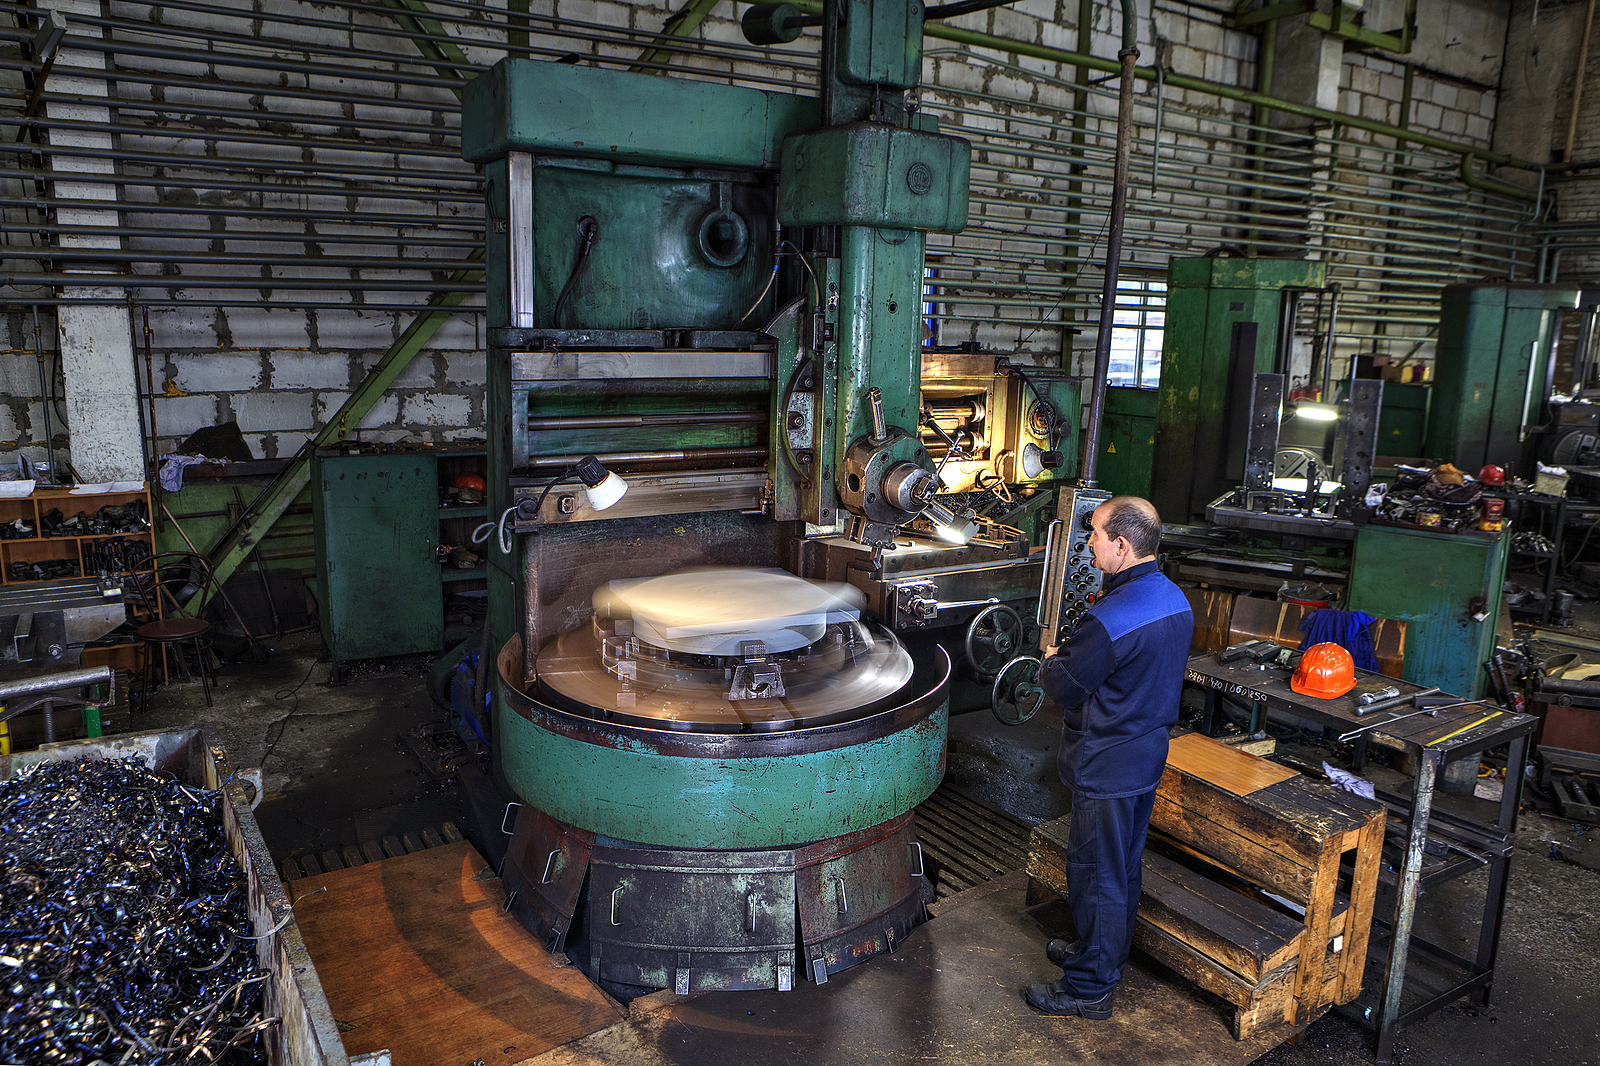
Both Vertical Turret Lathes (VTLs) and Vertical Boring Mills (VBMs) are large-scale machining tools used to shape metal, typically for aerospace, energy, and industrial components. And yes, they’re very similar. In fact, so similar that they’re often confused for one another.

Here’s the key difference:

A VTL is essentially a VBM… but with a turret.

That turret adds a layer of versatility and automation that the traditional VBM doesn’t offer.

Why the Confusion?

VBMs have been around longer, but they don’t get talked about as much these days. The term “VTL” is more widely used in modern machine shops, even when the equipment is technically a VBM. And since many VBMs can perform basic turning operations, the lines between the two blur even further.

So while both machines operate on a vertical axis and use similar base designs, it’s the tool turret that sets a VTL apart.

What the Turret Brings to the Table

A VTL’s turret offers key performance advantages:

  • Threading Capabilities: Built-in turret tools can perform internal and external threading without manual changeover.
  • Shorter Setup Times: With tools preloaded in the turret, there’s less downtime between steps.
  • Fewer Tool Changes: Less manual intervention means faster cycle times and more consistent results.

These benefits all add up to one thing—efficiency. More productivity, less downtime, and better ROI for shops running high-volume or complex parts.

Which One Should You Use?

It depends on the job.

  • If you’re machining large, simple parts with minimal tool changes, a VBM may be all you need.
  • If your projects involve complex profiles, threading, or frequent tool changes, a VTL will likely deliver better performance.

The right machine is the one that fits the part, the budget, and the timeline. And the right technician? That’s where FlexTrades comes in.

Looking for Talent or Opportunities?

Whether you’re a manufacturer needing skilled machinists or a technician ready to work on high-end equipment like VTLs and VBMs, FlexTrades can help.

There’s an old debate that always seems to resurface at summer cookouts: what actually makes a sandwich… a sandwich?

According to Merriam-Webster, a sandwich is either:

  • Two or more slices of bread or a split roll having a filling in between
  • One slice of bread covered with food

So here’s the question—does that mean a hot dog is a sandwich? What about a hamburger?

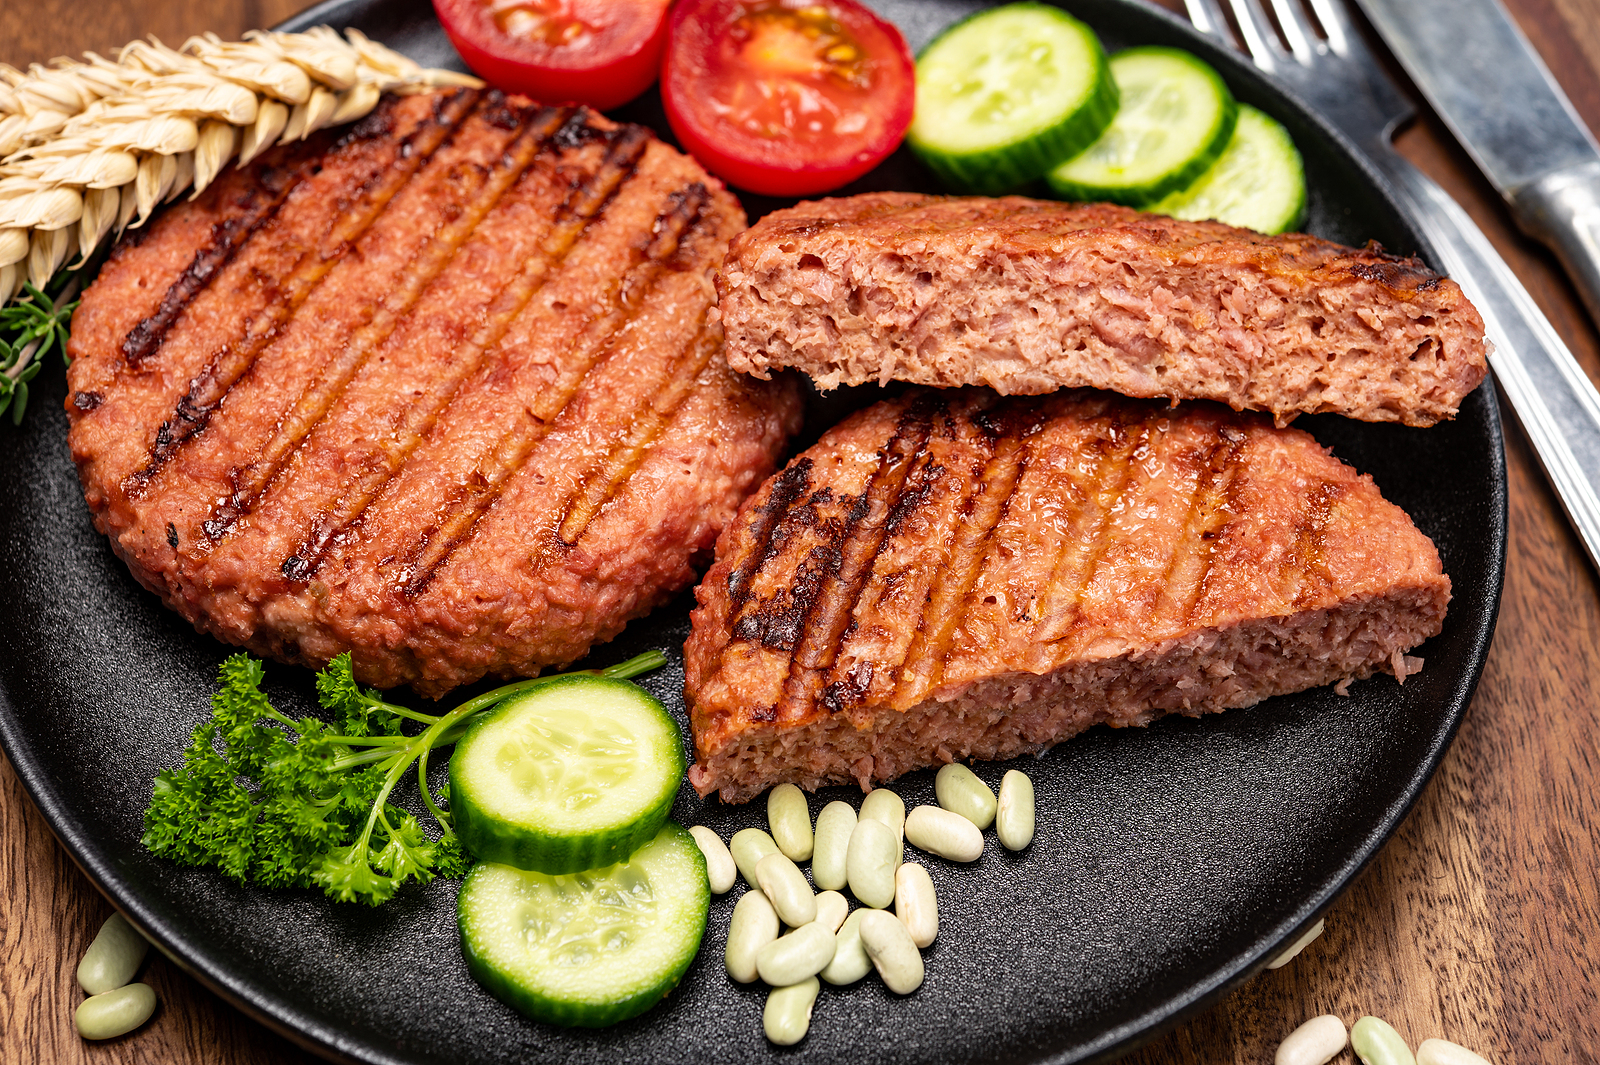
If you ask around, you’ll get more opinions than answers. Some say the type of bread determines it. Others argue it’s all about the filling. And once you introduce plant-based alternatives into the mix, things get even more complicated. Does using a Beyond Meat patty change the status of your sandwich?

Regardless of your stance, summer is in full swing here at FlexTrades HQ, and that means one thing—grill season. Burgers, brats, veggies, even balsamic honey peaches with feta (highly recommended). But lately, we’ve been wondering… how are plant-based burgers actually made?

That brings us to this edition of How It’s Made.

What Goes Into a Plant-Based Burger?

Plant-based meats have come a long way. Products like the Impossible Burger or the Beyond Burger are engineered to look, cook, and even taste like the real thing. But how is that possible?

It all starts with a combination of science, innovation, and some very specific ingredients.

Ingredient 1: Heme

Heme is the magic behind the flavor in animal-based meats. It’s what gives beef that rich, slightly metallic taste when cooked. In animals, heme is found in muscle tissue (myoglobin). In plants, it comes from the roots of legumes like soybeans, where it’s called leghemoglobin.

But growing soybeans just to harvest leghemoglobin is expensive and resource-intensive. So instead, food scientists figured out how to engineer plant-based heme using yeast fermentation. Add yeast, sugar, and minerals. Let it grow. Extract the heme. This engineered version delivers the flavor punch that makes these burgers taste like beef.

Ingredient 2: Compounds

Flavor is more than just taste—it’s smell. And recreating the aroma of beef requires duplicating its unique mix of compounds.

Scientists used a process called Gas Chromatography Mass Spectrometry to break down the compounds found in real beef. Once identified, those compounds can be replicated in the lab and added to plant-based patties to mimic the scent and taste of the real thing.

Ingredient 3: Plant Proteins

Texture matters. That bite and chew of a real burger? It comes from protein.

Using protein analysis, scientists identified the structural characteristics of beef proteins and matched them to plant-based equivalents. Wheat and potato proteins give the firmness and moisture retention needed to create the familiar texture of ground meat.

Ingredient 4: Fat

Coconut oil, stripped of its natural flavor, is used to add richness and juiciness to plant-based burgers. It mimics the melt and mouthfeel of animal fat, especially when cooked.

How Are Plant-Based Burgers Manufactured?

Once the core ingredients are assembled, they go through a precise manufacturing process involving thermal and mechanical stress. Rapid heating and cooling help blend and reshape the proteins and fats. The final product is extruded into burger patties and packaged for distribution.

This is not backyard science. It’s high-tech food production driven by chemistry, precision equipment, and deep knowledge of how people experience taste and texture.

So… Is a Hamburger a Sandwich?

That brings us back to our original question. Is a hamburger a sandwich? What about a plant-based hamburger?

If it walks like a sandwich and grills like a sandwich… you decide.

One thing’s for sure—whether it’s beef or Beyond, grilled patties between buns are part of the American summer tradition. And we’re here for it. 

FlexTrades provides workforce solutions to American manufacturers. That’s what we do. But we take the word “solutions” seriously. That means asking the right questions and listening closely to the answers. Along the way, we also get asked a lot of questions ourselves—especially when it comes to skilled trades advocacy. One of the most common?

How do you advocate for technical education and careers in the skilled trades?

Let’s talk about that.

Why Advocacy Matters

At FlexTrades, we believe that everyone in manufacturing—not just companies, but individuals—has a responsibility to advocate for careers in the skilled trades and technical education. These industries are foundational to the American economy, yet they continue to face workforce shortages, declining enrollment in trade programs, and a cultural bias that still favors four-year degrees over hands-on careers.

That’s why advocacy matters. But what does advocacy actually look like in practice? And how can you do it as one person?

Let’s break it down.

Do Your Homework

Advocacy starts with understanding. If you want to speak up for the trades, you need to know the issues. Go beyond surface-level statistics and headlines. Ask tough questions. What’s really driving the skills gap? What policies and perceptions are holding technical education back? What are the long-term implications for manufacturing if the talent pipeline continues to shrink?

When you dig deep, your voice carries more weight. Informed advocates don’t just raise awareness—they influence change.

Think Big

When you advocate, you’re not just speaking for yourself or your company. You’re representing an entire industry. That means thinking beyond your own experience and considering the broader ecosystem—students, workers, educators, employers, and policymakers.

Understand the challenges and the innovations. Get clear on the wins, the gaps, and the opportunities. Then focus on solutions that benefit everyone. Advocacy is about inclusion and momentum. The more people you bring with you, the more impact you’ll have.

Build Partnerships

No one advocates in a vacuum. Look for others in the industry who are pushing in similar directions—even if their mission isn’t identical to yours. Shared values and overlapping goals make for strong partnerships.

Whether it’s a local trade school administrator, an apprenticeship program coordinator, or a manufacturing executive who sees the same workforce problems you do, build the bridge. Work together. Share resources. Amplify each other’s efforts. That’s how real movements gain traction.

Plan for Resistance

Advocacy isn’t easy. It’s not supposed to be.

You’ll face resistance. From outdated systems. From people who prefer the status quo. From stakeholders who don’t want to disrupt what’s already working for them. But if what’s “working” isn’t solving the larger problem, it’s your job to say so.

Be willing to challenge old assumptions. Be brave enough to stand alone when necessary. True advocacy creates space for new ideas, better systems, and lasting progress—even if it makes a few people uncomfortable along the way.

Tools and Resources to Help You Get Started

If you want to dig deeper, here are a few great places to start:

Got Questions? Let’s Talk.

Have your own question about manufacturing, labor shortages, or technical training? We’d love to hear from you. Reach out to us anytime at writingteam@flextrades.com, and we might feature your question in a future article.

Cleaners. Sanitizers. Disinfectants.

While cleaning, sanitizing, and disinfecting might seem synonymous, they serve distinct purposes. For this edition of “How It’s Made” with FlexTrades, we’re focusing on sanitizers—specifically, commercial hand sanitizer.

Hand sanitizers have become a staple in our daily routines, especially in recent times. While many have turned to DIY recipes, we’re diving into the commercial manufacturing process that ensures consistency, efficacy, and safety.

Key Ingredients in Hand Sanitizer

The effectiveness of hand sanitizer hinges on its composition.

Active Ingredients:

  • Alcohols: Ethyl Alcohol (Ethanol) or Isopropyl Alcohol are primary antiseptic agents. For efficacy, hand sanitizers should contain an alcohol concentration between 60% and 95%.
  • Benzalkonium Chloride: An alternative antiseptic agent used in some formulations.

Additional Ingredients:

  • Emollients and Gelling Agents: These provide moisturization and contribute to the gel-like consistency.
  • Denaturants: Added to deter ingestion by imparting a bitter taste.
  • Fragrances and Colorants: Enhance user experience with pleasant scents and appearance.

The Manufacturing Process

Producing commercial hand sanitizer involves several meticulous steps to ensure a high-quality product.

1. Compounding

  • Preparation: Raw materials are measured and added into large vessels known as batch tanks or mixers. Depending on the ingredient, this can be done manually or automatically.
  • Mixing: Mechanical agitators within these vessels blend the ingredients under controlled parameters, such as time and speed, to achieve a uniform mixture.

2. Quality Control

  • Sampling: Technicians extract samples from the mixture to verify adherence to specifications, including viscosity and alcohol content.
  • Adjustments: If deviations are detected, formulations are adjusted accordingly to maintain product integrity.

3. Filling, Capping, and Labeling

  • Filling: The blended sanitizer is transferred from holding tanks to filling machines, which dispense precise volumes into individual bottles.
  • Capping: Caps are automatically oriented and secured onto the filled bottles.
  • Labeling: Bottles receive labels through heat-pressed applications or adhesives, often at impressive speeds reaching up to 200 bottles per minute.

4. Packaging and Palletizing

  • Boxing: Finished bottles are systematically placed into boxes.
  • Palletizing: Boxes are stacked onto pallets, ready for storage or shipment to meet consumer demand.

5. Ongoing Quality Assurance

Throughout the entire production line, continuous quality checks are conducted—from initial raw material assessment to final product inspection—to ensure safety and efficacy.

Final Thoughts

The production of hand sanitizer is a testament to the precision and dedication inherent in manufacturing. At FlexTrades, we celebrate the intricate processes and skilled professionals that bring essential products to market, ensuring safety and well-being for all.

The temperatures are climbing. You’re driving from one assignment to the next. You’re focused, dialed in, ready to work. But as your Project Manager always says—safety first. What does that actually mean when you’re on the road in the heat of summer?

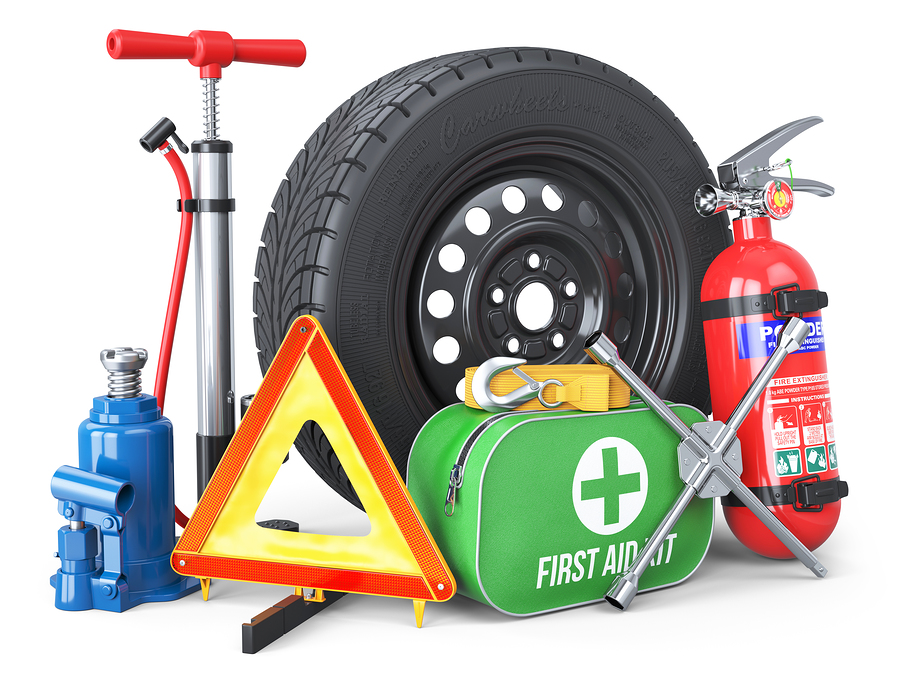
In honor of National Safety Month, we’ve pulled together 15 must-have items that every traveling technician, tradesperson, or road warrior should carry in their car during the hotter months.

15 Summer Safety Items You Should Keep in Your Vehicle

Whether you’re heading to a new job site or just navigating your regular route, make sure your car is stocked with these essentials.

  1. First Aid Kit: Fully stocked and accessible. You never know when you or someone nearby might need it.
  2. Sunscreen: An extra bottle goes a long way. You’re not always in the shade, and sunburn can sneak up fast on long days.
  3. Jumper Cables: Help yourself or someone else out of a jam. It’s a small item that makes a big difference.
  4. Basic Toolkit: An adjustable wrench, duct tape, a couple screwdrivers, and pliers can help fix minor issues without delay.
  5. Reflective Blanket: Great for creating shade or staying warm when the temperature dips at night.
  6. Reflective Triangles or Roadside Flares: Stay visible if your vehicle breaks down, especially in low light.
  7. Heat-Resistant Snacks: Granola bars, trail mix, or anything that won’t melt or spoil in the heat.
  8. Water: Keep a few bottles handy—for drinking, refilling your radiator, or cleaning up in a pinch.
  9. Tire Sealant: A temporary fix if you get a flat and can’t make it to the shop right away.
  10. Tire Jack: Make sure it’s compatible with your vehicle and in good working condition.
  11. Work Gloves: Protect your hands and improve your grip when dealing with tools or hot surfaces.
  12. Flashlight or Rechargeable Light: Battery-powered or solar—just make sure it works when you need it most.
  13. Map or Road Atlas: Old school, sure. But if GPS fails, you’ll be glad you have it. Just make sure you know how to read it.
  14. Spare Phone Charger: Keep a backup in your glovebox or bag—charged and ready to go.
  15. Emergency Radio: Stay informed when cell service is limited, especially during storms or natural disasters.

Be Safe. Be Smart. Be Ready.

At FlexTrades, safety is never an afterthought. It’s a mindset. And being prepared for the unexpected isn’t just good advice—it’s part of the job. Keep your car stocked. Keep yourself protected. And keep moving forward with confidence.

Want more tips on workplace safety?
Check out our article on Reinforcing Safety in Your Workplace.

Welcome to the first edition of FlexTrades’ “How It’s Made”—where we break down the manufacturing process behind everyday products. Today, we’re rolling out an inside look at how toilet paper is made.

With demand always high, it’s easy to forget that toilet paper hasn’t always been a household staple. If you’re curious about its origins, check out the history of toilet paper—but today, we’re here to focus on how it’s made.

How Is Toilet Paper Made?

Toilet paper is, at its core, just paper—which means its journey starts in the forest, moves to a lumber mill, is processed at a paper mill, and finally, is turned into the final product at a manufacturing facility.

Step 1: Harvesting Wood from Forests

Toilet paper is typically made from a blend of hardwoods and softwoods—about 70% hardwood and 30% softwood. Hardwoods provide softness, while softwoods add strength to the final product. Once trees are harvested, they are shipped to the lumber mill.

Sustainability Note: New trees are planted after harvesting to maintain forest resources.

Step 2: Processing at the Lumber Mill

At the lumber mill, trees go through two key processes:

  • Debarking – The outer bark is removed while preserving as much usable wood as possible.
  • Chipping – Logs are cut into small, uniformly sized wood chips (typically 1” x ¼”).

These wood chips are then sent to the paper mill for further processing.

Step 3: Pulping & Sheet Formation at the Paper Mill

At the paper mill, wood chips are turned into pulp through a multi-step process:

  1. Cooking – The chips are “cooked” with chemicals to remove moisture and break them down into pulp.
  2. Processing – The pulp undergoes washing, bleaching, and additional chemical treatments.
  3. Stock Preparation – Water is added to create a paper stock, which is then passed through a series of rollers, dryers, and heaters to reduce moisture.
  4. Sheet Formation – The result is large, matted fiber sheets, which are wound onto jumbo reels (some weighing up to five tons). These reels are sent to manufacturing facilities for final processing.

Step 4: Manufacturing & Packaging

At the manufacturing facility, jumbo reels of paper sheets go through the following steps:

  • Unwinding & Slitting – Large sheets are unwound, cut to size, and rewound onto cardboard tubes.
  • Roll Sizing – These large rolls are then cut down to the standard 4.5” x 4.5” toilet paper roll size.
  • Stacking & Packaging – Finished rolls are stacked, wrapped, and packaged for distribution.

And just like that, the toilet paper rolls you see in stores—or sometimes don’t see—are ready for use.

Want to See It in Action?

Check out this video from Georgia-Pacific, the manufacturer behind Angel Soft and Quilted Northern.

Final Thoughts

Toilet paper is a simple yet essential product, requiring precision, efficiency, and large-scale production to meet demand. And while most of us only think about it when the shelves are empty, the process behind it is a fascinating look at modern manufacturing and supply chain logistics.

Stay tuned for more editions of “How It’s Made” from FlexTrades, where we break down the process behind the products you use every day. 

Spring brings warmer weather, melting snow, and… slippery roads. As ice and frost linger on highways and sidewalks, salt trucks hit the streets to keep drivers safe. But have you ever wondered where all that road salt comes from—and what impact it has?

Where Does Road Salt Come From?

The main ingredient in road salt is sodium chloride, the same compound found in table salt. Mines in Ohio, Michigan, New York, Kansas, and Louisiana produce nearly 90% of the salt used on U.S. roads. It’s the most effective and widely used deicing method, but it comes with some serious downsides.

The Environmental & Vehicle Impact of Road Salt

As winter fades and spring arrives, road salt doesn’t just disappear. It runs off into streams, lakes, and rivers, disrupting plant and animal life. Too much salt in these ecosystems can damage habitats and even cause long-term environmental harm.

Salt also accelerates vehicle corrosion. If not washed off regularly, it can eat away at metal components, leading to expensive repairs.

Sand: A Safer, Cheaper Alternative?

Because of these concerns, many states supplement or replace salt with sand. Unlike salt, sand doesn’t melt ice, but it improves traction and helps vehicles maintain control on slick surfaces. It’s also about 75% cheaper and less harmful to the environment.

Stay Safe on the Road

No matter what deicing method is used, icy roads remain a seasonal hazard. Keep an eye out for salt and sand trucks, drive cautiously, and be aware of changing conditions.

Want to learn which states use the most salt and sand? Check out these resources:

🔗 State-by-State Salt & Sand Usage
🔗 Salt Belt & Vehicle Corrosion Risks