Several years ago, I took a trip to DC to visit my sister, a US Air Force Master Sergeant (MSgt). We spent one day walking nearly 12 miles at the National Mall, hitting up all the “must see” places, including:

  • The White House (where the first Black president of the United States hopped into a helicopter and flew to Boston while we watched in awe)
  • The Washington Monument
  • The buds of the cherry blossoms as they were just starting to pop
  • A private tour of the US Capitol building with an intern from the Senator’s office
  • The WWII Memorial where we remembered our grandfathers
  • The Vietnam Veterans’ Memorial where we shaded in the names of complete strangers
  • The Lincoln Memorial
  • The grounds of the Korean War Veterans Memorial
  • The FDR Memorial to ‘fear nothing but fear itself’
  • The Tidal Basin
  • The Thomas Jefferson Memorial

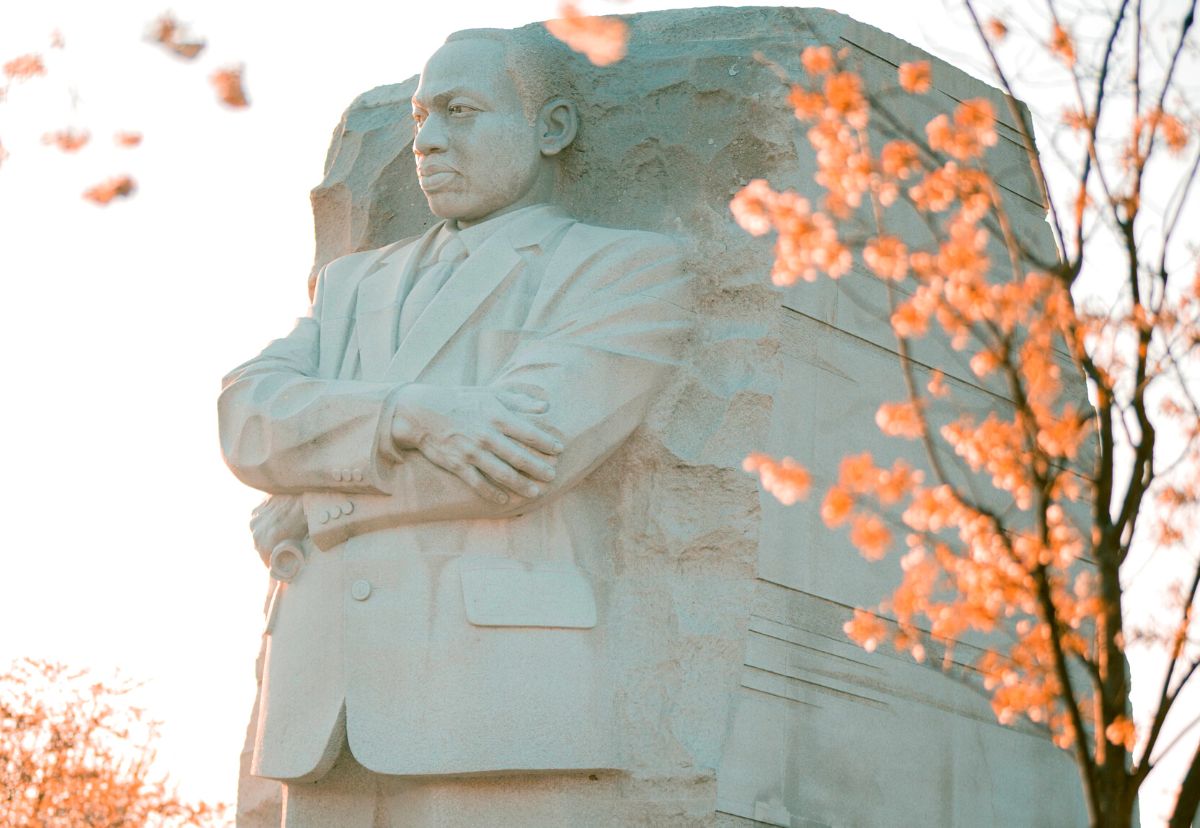
In the end, we got to watch the helicopters fly back overhead as President Obama returned from Boston that evening. It was an incredible day that still brings back so many emotions and memories. One thing that stands out to me is the simplicity and magnitude of the MLK Jr. Memorial. A giant piece of rock (30 feet high) with MLK Jr.’s image carved into it and the simple statement:

‘Out of the mountain of despair, a stone of hope.’

Growing up in southwestern Minnesota, I learned how Martin Luther King Jr. had changed the world. It was on the grounds outside of Ebenezer Baptist Church in Atlanta where I was lucky enough to take some time to ponder how different the world could have been had that fateful April day in 1968 never happened.

I learned to treat others the way I wanted to be treated, to befriend (and defend) anyone who looked like they needed a friend and to never take for granted the gifts and abilities I had. As one of four kids in a dual-income, lower-middle class family, we played with all the kids in the neighborhood and befriended the children who came in and out of the women’s shelter  just behind our house. It never dawned on me that Josh was any different than me just because he had dark hair, dark eyes, and dark skin while I had dark hair, dark eyes, and lighter skin. It didn’t occur to me  that Judy might have bigger struggles than me because her tall, white father had fallen in love with a petite, beautiful black woman.

I’m hopeful that I’m doing as good of a job with my children as I believe my parents did with their own. However, I know that the world around us hasn’t gotten any better. We still have so far to go in fighting for MLK Jr.’s dream.

To celebrate Martin Luther King Jr.’s legacy (this link shares history of MLK Jr. Day), I leave you with two inspiring MLK Jr. quotes:

“Never, never be afraid to do what’s right, especially if the well-being of a person or animal is at stake. Society’s punishments are small compared to the wounds we inflict on our soul when we look the other way.”

“I refuse to accept the view that mankind is so tragically bound to the starless midnight of racism and war that the bright daybreak of peace and brotherhood can never become a reality… I believe that unarmed truth and unconditional love will have the final word.”

FAQs for PMG 

PMG provides labor solutions to American manufacturers. That’s what we do in a nutshell and we take the “solution” part of that equation seriously. As a result, all of us here end up asking a lot of questions to make sure we find the right way to solve the real problem. Additionally, the community asks a fair amount of questions too. In this blog, PMG answers the most common questions. 

Do I need a forklift certification? 

Great question! Forklift operation certifications are very common in the manufacturing industry, but you don’t need to carry an “active” forklift certification to be eligible to work on a PMG project. However, having been previously certified to operate a forklift is very much preferred experience for our technicians. This is simply because anyone who uses a forklift on our projects will have to certify to that client’s in-house standards while onsite.  

There are other certifications that are occasionally required for a technician to be eligible to work on PMG projects. The most common of these are OSHA and/or MSHA safety certifications as well as Commercial Driver’s Licenses (CDLs). 

Interested in More? 

There are many other licenses and certifications, besides those previously mentioned, that can significantly help a technician qualify for a position or help themselves stand out amongst all those who do.  

  • Zippia has also selected a list of 20 that production workers should consider getting for a leg up on the competition in 2021.  

Rubber stamp forklift certifiedLooking to join our team? 

Recently graduated from a technical training program? Please consider joining our team through PMG ReTool. 

If you’ve got experience, we have opportunities for you too! Join our PMG Talent Network now. 

Have a question of your own? 

We want to answer your questions. If you have any at all, send them to writingteam@pmgservices.com and we will get them answered in future FAQs! 

Then…

At the age of 41, it’s fair to say I’ve known the magic of Santa Claus for a good three decades. When my kids were born, I had the desire to keep Santa alive in their hearts for as long as I could. Only problem: I’m a horrible liar. When my then far-too-smart-for-her-own-age seven-year-old asked for the umpteenth time if Santa was real, I couldn’t lie any longer. I cried right along side her as she grieved the loss of that jolly fat man, and I grieved the loss of her innocence. What kind of mother am I?

And Now…

Fast forward a few years when neither of my kids are believers anymore. We still enjoy the annual tradition of tracking Santa’s whereabouts every Christmas Eve. Which got me thinking, why in the world does the North American Aerospace Defense Command (NORAD) take the time, the money, and the energy to invest in tracking a fictional character and his eight tiny reindeer across the globe. Turns out, it was all a mistake.

And How…

According to the NORAD website, it all started by accident back in 1955. A child inadvertently called the Continental Air Defense Command (the precursor to NORAD) instead of a local department store, asking to talk to Santa Claus. The commander on duty that night quickly realized the error. In the spirit of the season, the commander pretended to be Santa to make the little kid’s dream come true. And that’s it – how incredibly sweet and simple is that?

For 65 years now, tracking Santa’s whereabouts has become the Department of Defense’s largest community outreach program. Millions of visitors go to their website coming from more than 200 countries around the world each season.

If you’re looking for something fun to do this Christmas Eve, follow Santa’s flight patterns by jumping on any of NORAD’s social media platforms linked below:

Until December 24th, enjoy the magic of the season and the joy that one simple error can bring to a world full of tiny children just watching and waiting for Christmas morning! If you’re interested in reading more, please check out PMG’s blog!

Beth Bangtson, Director of Human Resources

FlexTrades has lunchbox hacks because FlexTrades believes that those who eat better work better. This blog is our effort to improve the American workforce one lunchbox at a time. We want you to feed yourself with something that fuels you better and we have tips, tricks, and recipes to make that possible! If you missed our last lunchbox hack, check it out on our blog page now.

With Thanksgiving barely behind us, and Christmas just ahead, many people are making (and eating) more sweet potatoes now than the rest of the year combined. That means an awful lot of those tasty tubers are probably finding their way into your lunchboxes as leftovers too. How do you freshen up such an old staple and are you choosing them correctly to begin with?

Tip

Thinner, longer sweet potatoes and yams (Is there even a difference? You bet there is!) are easier to cook due to more even heat distribution while cooking. So, next time you’re at the grocery store, skip the fat ones. Your results and prep time will both benefit.

Trick

Slashes > Pokes! Most people like to stab their sweet potatoes with a fork. However, if you treat your yams like Michael Myers (think BIG knives) by deeply slashing them you’ll thank us. This happens because the larger surface area of a slash allows heat to penetrate more quickly and evenly than little pokes. A secondary benefit is that more water can escape too so you’re also less likely to end up with a watery side dish.

Recipe

For those who really want to make an impression, try something you’ve never thought of before to change up tradition. A great option is this Mashed Sweet Potato Recipe with Crunchy Peanut Butter we received from Ilse, at Culinary Ambition. It’s a great way to mix things up at your next holiday spread. We promise you won’t be able to wait to get the leftovers into your lunchbox for your next workday either!

We hope you find these tips and tricks helpful and the recipe tasty. If you like what you learned, skim through our other blog posts here the next time you’re hungry for more knowledge. Have a tip, trick, or recipe of your own? Send it to our Writing Team and we’ll be happy to feature it in a future Lunchbox Hack too!

In this edition of How It’s Made, we’ll be talking Printed Circuit Boards (PCBs). It’s a pretty hot topic right now. The printed circuit board market is set to reach nearly $68.5 billion worldwide by 2025. At the same time, this industry is set to have a compound annual growth rate (CAGR) of 6.7%. Which is fantastic news considering the most recent complications that COVID-19 added to PCB manufacturing and supply chain. With that news, we thought we’d give you some extra insight into just how PCBs are manufactured.

PCBs / Printed Circuit Boards – What Are They?

PCBs are boards that electronically connect electronic components through mechanical support. What does that mean, though? PCBs support electronics and electronic components but do so without wires! How is that possible, you ask? PCB components include pads, tracks, capacitors, and resistors, and more. More on that later, though!

Prior to PCBs, there were point-to-point wired boards. Although these did the job, they would often short-circuit when wire insulation began to age or crack and when wire junctions caused failures. Additionally, electronics became more prevalent in consumer goods over time (as well as cheaper and smaller), leading to the PCB.

PCB Components & Terminology

PCB Components
  1. Batteries: provide the voltage to the circuit.
  2. Resistors: control electrical current/flow through a circuit.
  3. Capacitors: store electrical charge.
  4. Connectors: provide connections of devices to another device.
  5. Diode: provide direction for the current. Current can only travel in one direction.
  6. LEDs: diodes that emit light. Lights up when current flows through it.
  7. Relays/Switches: operate electrically opening/closing circuits, as needed, for current flow.
  8. Transistors: amplify charges.
  9. Inductors: work to oppose any sudden changes in the current.
PCB Terminology
  1. The exposed metal on the surface of the board, where components are soldered are called pads
  2. The thin stencil that lies over the board, allowing solder paste to be deposited in specific areas during assembly is called paste stencil
  3. A way to build boards without requiring the component to have leads for soldering purposes (which are passed through hole boards) is called Surface Mount. This is the dominant type of board used today.
  4. Another way to build boards includes Through Hole. In this way, boards require components to have leads, which are pushed through holes on the board before soldering.
  5. The continuous path of copper on a circuit board is called trace.
  6. The metal that makes the electrical connections between the surface of the board and the electronic components also acts as a strong adhesive for the components. This is called Solder.

PCB Layers

  • PCBs consist of multiple layers of heated and laminated material. Then, the multiple (and various) types of components mentioned above are soldered on to the board (in very specific ways) to allow the electrical charge to flow and guide it to the correct destination.

Board Layers

PCBs consist of multiple layers, with each layer performing a basic function pertinent to the placement of components and for the intended end use.

Layer 1: Base Material
  • Typically, fiberglass. This provides the strength/rigidity of the board and varies in thickness according to end use.
Layer 2: Copper
  • Heat and adhesive laminates a thin copper foil (and copper patterns) to the board. Lamination can occur on one side (single layer boards) or on wo sides (double layer boards). Multi-layer boards will have multiple sets of base material/copper layers.
Layer 3: Solder Mask
  • Next, Solder Mask covers the copper while keeping pads and rings exposed. This is the green part of the board. This insulates the copper and protects it from contact with solder, conductive bits, or other metal.
Silkscreen
  • This is the layering on top of soldermask. This adds the letters, numbers, and symbols to the board for easy assembly as well as understanding of the board. Typically, white but can be any color.

The Making of PCBs

The general process for manufacturing PCBs is:

  1. Creating the fiberglass core board.
  2. Laminating copper layers and pattern on top of fiberglass core board.
  3. Bathing the board to remove unwanted copper, leaving only the traces.
  4. Applying soldermask as a protective layer.
  5. Applying silkscreen which provides the pattern for component placement.
    • We now have a bare/blank board.
  6. Adding PCB components.

There are two ways to add PCB components. Hand soldering or SMT machines. I explain both below.

Hand Soldering
  • Boards are blank (or bare) with an outline printed of what types of components go where, to include numbered/labeled components.
  • Solder Technicians hand solder a kit of components to the bare/blank board.
  • Technicians work from print, work instructions, and kitted materials.
  • You can find an example of hand soldering here.
SMT Machine Operations  
  • SMT (Surface Mount Technology)
  • A series of machines operate in a line to manufacture Printed Circuit Boards by pushing bare/blank boards down the line on trays or conveyors. Each build operation (loading, placement, coating, printing, curing, inspection) occurs in a proper sequence. SMT lines increase the speed and quantity of PCB production and are also ideal for less complex boards.  You can find an example of this Machines in this process include do a variety of tasks including placing components on the board, coating/sealing, soldering components, screen printing, melting solder, inspecting, and stacking.
  • You can find an example of SMT Machines here.


Below are two examples of PCBs – blank/bare board and a populated board.

Blank Board
Populated Board


FAQ: What is IPC, IPC -610, and J-Std-001?

PMG provides labor solutions to American manufacturers. That’s what we do in a nutshell and we take the “solution” part seriously. We end up asking a lot of questions to make sure we find the right way to solve the real problem. Actually, our community asks a fair amount of questions, too. In this blog, PMG answers the most common questions.

IPC

What we know as IPC commonly is actually IPC International, Inc., (which wasn’t always the legal name). In 1957, a group of six printed circuit board manufacturers got together to create the Institute of Printed Circuits (IPC). The goal of this institute was to create industry standards, support industry advancements, and remove supply chain obstacles (something we all understand even in 2021). In 1999, the organization brought more manufacturers into the group and also stretched into the electronics industry as a whole. With this, the IPC changed it’s name, too. It was now The Institute for Interconnecting and Packaging Electronic Circuits. The name changed once again, when the organization gained more influence and exposure. This time to IPC International Inc. or what we call IPC.

The IPC continues to monitor, advance, review, and regulate the electronic industry. It does this by setting standards for the development, testing, and quality of electronics and Printed Circuit Boards (PCBs). This includes J-STD-001.

J-STD-001

J-STD-001 is formally known as IPC J-STD-001H, which is a mouthful to say so it’s often shortened to J-Standard (J-Std.). This standard ensures companies follow the criteria for soldering processes and materials on a global scale including assembly processes, inspection processes, and testing processes. It ultimately emphasizes process control and process requirements for soldering electronics, to include a required certification by those who are assembling and soldering PCBs.

IPC-610

Do you see a reoccurring theme with these industry standards? They have long, drawn out names and titles. IPC-610 is a shortened version for the IPC-A-610 Endorsement. What does this standard do? It qualifies someone to complete inspections and acceptability tests on electronics and PCBs, verifying that all work performed is to IPC standard (such as J-STD-001).

Interested in More?

As you can imagine, there are MANY more standards that fall into IPC categories, far too many to list. If you’re interested, you can find them here.

Are you IPC-610 or J-STD-001 Certified?

Join our PMG Talent Network.

Have a question of your own?

We want to answer your questions. If you have any questions at all, send them to writingteam@pmgservices.com and we’ll get them answered!

Kim Mooney, Technical Manager & Coach

Steel. It’s quite literally ALL around you. From buildings (metal roofing, steel beams, mounting brackets) to vehicles, to infrastructure (bridges, safety barriers), sculptures and jewelry (art), in the ground, at your doctor’s office (scalpers, surgical pins), or in your kitchen (scissors, sinks, cutlery). And, like many others, you probably haven’t thought about where steel comes from so let me tell you!

How It’s Made – Steel

Step 1: Gather raw material, place into a furnace and melt into molten metal.

Mine iron ore from the ground.

Due to the properties of iron ore, it must be “reduced”. Reduction is the process of crushing coal then carburizing it in a furnace and heating it at high temperatures, without oxygen, which creates coke. The coke comes out as small black rock pieces with a high concentration of carbon.

Fact: it takes about 1.5 tons of iron ore to produce 1 ton of steel.

Combine iron ore, solid carbon (carburized coke), and some limestone in a blast furnace to create molten metal.

A blast furnace works by blowing heated air into the bottom of the furnace to create a combustion process amongst the three ingredients. This process creates molten pig iron.

  • Technically, pig iron is neither iron nor steel.
  • The limestone added to the blast furnace removes impurities such as silicon dioxide (sand and rock).

Step 2: Use ladles to take molten metal to additional furnaces.

  1. Combine the molten pig iron with recycled steel scrap in oxygen furnaces.
  2. Oxygen furnaces blow oxygen at the molten metal at high pressures which burns off impurities.
    • Electric Arc Furnaces (EAFs) make steel from scrap instead of iron ore which usually produces lower quality steel but benefits from a recycling perspective.

At this stage, molten iron is now molten steel!

Step 3: Use ladles to pour molten steel into tundishes.

Tundishes feed a continuous caster. The continuous caster forms and draws out the molten metal into the desired shape(s) and cuts these shapes to sizes.

Shapes include ingots, blooms, billets, or slabs which are considered semi-finished casting products and are not ready to be used yet.

Step 4: Use rolling mills for next steps.

Rolling mills will process the steel shapes into additional product including plate, steel coil, or rods and bars.

Depending upon the temperature of the rolling mills, you are either creating hot rolled steel or cold rolled steel.

Step 5: Use various equipment for finishing operations.

Operations here include pickling, coating, tinning, annealing, tempering, cutting, slitting, coiling, and packing.

[av_image src=’https://flextrades.com/wp-content/uploads/2021/10/steel-.jpg’ attachment=’9269′ attachment_size=’full’ align=’center’ animation=’no-animation’ link=’manually,https://www.steel.org/steel-technology/steel-production/’ target=” styling=” caption=” font_size=” appearance=” custom_class=”][/av_image]

Now that you know, check out this video to see it for yourself and also, don’t forget to check out PMG’s blog for more of our How It’s Made articles.

Kim Mooney, Technical Manager & Coach


The history of manufacturing and the four industrial revolutions are unique in comparison but one commonality they share is the metal working mill. The metal working mill doesn’t have the same extensive history as the metal working lathe, but it has a history nonetheless.

Eli Whitney Invents the Mill

The origination of the mill is difficult to determine. For the most part, mills can be traced to the 1700s at a time when clock makers used mills to cut out balance wheels. However, it wasn’t until 1818 that the United States was able claim rights to the mill. And, all credit goes to Eli Whitney, the inventor of the cotton gin (which was invented in 1793). With the cotton gin up and running, Eli wanted to do his next big thing. He soon recognized his opportunity. With the US under threat of war with France, the US government was soliciting bids from contractors for the production of muskets. This is where Eli comes in.

At the time, muskets were hand formed by skilled workmen. This caused inconsistencies across each individual musket in design, fit, and form, and also made replacement parts difficult to get. It was time for a change. So, Eli got to designing machine tools that could manufacture parts at a faster rate and manufacturer repetitively. He thought was that machine tools would keep musket components uniform in shape, size, and design, unlike the hands of craftsman. With consistent and repeated machine tool operation, parts could be inventoried and also interchangeable. This idea of Eli’s ultimately created the production system as we know it. In 1801, Eli presented the system to Thomas Jefferson (President-elect at the time). Jefferson witnessed it in full and saw its value. With  approval (or at least the acknowledgement of greatness), Eli continued to manufacture arms with his invented machinery, passing down his arms shop (located in Hamden, Connecticut) to his son, Eli Whitney Jr.

Since Inception

Fast forward, many GREAT changes to the mill have progressed through the Industrial Revolutions. An American engineer (Joseph R. Brown) showcased his universal milling machine at the Paris Exhibition in 1867. Another American engineer further improved this machine in 1936. He thought the machines should provide more movement and allow the tool to approach work pieces at different angles and locations, with less manual operations. This engineer (Rudolph Bannow) named his machine the Bridgeport which manufacturing facilities across the US still use in production.

However, a Bridgeport is still very manual in nature so with the rise of automation, computers, and digital applications, we’ve seen the mills transform to what they are now – CNC Mills – but that’s a story for another time.

PMG provides labor solutions to American manufacturers. That’s what we do in a nutshell and we take the “solution” part of that equation seriously. As a result, all of us here end up asking a lot of questions to make sure we find the right way to solve the real problem. Additionally, the community asks a fair amount of questions too. In this blog, PMG answers some of the most common questions.

What is ITAR?

Great question! Simply put, ITAR stands for International Traffic in Arms Regulations. These are federal government regulations that apply to any vendor whose product or service is for defense-related applications or military end-use. ITAR also applies to any contractors or sub-contractors involved with those products or services. ITAR compliant companies have to recertify annually and the main goal of certification is to ensure the restricted access of foreign nationals to anything that might be sensitive to national defense initiatives. Maintaining compliance is especially complicated, and critical, for multi-national companies with facilities located in many different countries!

Individual companies dictate how they enforce ITAR. However, those pursuing employment with ITAR compliant manufacturers and contractors will need to provide documentation that verifies their identity meets ITAR status. Two forms of government issued IDs are typically required, one of which must be photo ID. For a more detailed selection of which documents are acceptable, take a look at what’s required to attend a defense conference.

Interested in More?

Here’s a link to more details regarding the specifics of ITAR compliance. Then head to our website to read more PMG FAQs.

Looking to join our team?

  • Recently graduated from a technical training program, please consider joining our team through PMG ReTool.
  • If you’ve got experience, we have opportunities for you too! Join our PMG Talent Network

Have a question of your own?

We want to answer your questions. If you have any at all, send them to writingteam@pmgservices.com and we will get them answered in future FAQs!

Let me take you back to my childhood living room. Picture it with me: a couch, a love seat, a floor model television, a console table, and a lamp or two. Typical furniture items, typical colors, typical living room. However, one thing sticks out that wasn’t so typical. Sitting on the console table shelf was a kaleidoscope. I’m not sure where my mom purchased it (or why) but I loved it.  I’d often pick it up from its stand, carefully place it to my eye, and slowly turn the end. Constantly finding myself in wonder and awe at the changing colors and designs, I also remember thinking, how does this work, is it magic? Now that years have gone by, I’ve learned it’s not magic at all but still very interesting.

Kaleidoscope Components

Kaleidoscopes bring together a combination of simple mirrors, angles, and objects in a scientific way. No magic, no mystery. At one end of the tube is an eye piece, at the other end is an end cap. Inside this, there are two or three mirrors (or reflective surfaces) positioned at specific angles to each other. This alignment creates a V-shape or a triangle. Most kaleidoscopes have everyday objects objects between the mirrors: glass pieces, ribbon, confetti, glitter, feathers, flower, beads, and buttons. These objects in thin, round boxes (made of transparent material like glass or plastic) called cells, which are just large enough for the items to freely move. Seems simple enough but where is the science?

Kaleidoscope Science

The science comes when light enters the kaleidoscope tube and travels in a straight line. However, when it bumps into something, it changes direction. This is called reflection. When light coming into a kaleidoscope hits the mirrors, it reflects back in the direction from which it came. When light hits the objects inside the kaleidoscopes, it reflects toward the mirror,  resulting in constant reflection and redirection within the tube. Think of it as a laser light show only the colors, shapes, designs and patterns of the show are determined by the objects within the kaleidoscope.

Kaleidoscope Fun

Since the objects move freely within the kaleidoscope tube, the reflection of light against the objects inside the kaleidoscope can not replicated. This means you will never see the same pattern or design in a kaleidoscope twice. So, next time you find yourself looking through the eye piece of a kaleidoscope, move slowly, soak up the beauty, and find the wonder and awe in it!  Also, check out PMG’s blog for more interesting and intriguing How It’s Made articles.

Kim Mooney, Technical Manager & Coach