May is the month of flowers. Blooms burst in every color, painting landscapes in bright contrast to April’s gray skies. But here in Minnesota, we’re just as proud of another kind of flour — the kind that helped build an industry and shape a city.

In celebration of the season, we’re looking back at the history of flour milling — from its ancient roots to its peak in the Twin Cities, and where the industry stands today.

First Tools, First Grains

Humans started making tools nearly 250,000 years ago, but those early creations were mostly for hunting and survival. It wasn’t until around 10,000 to 15,000 years ago that we turned our focus to agriculture.

Grain, unlike meat or produce, was easier to store and transport. That made it perfect for trade — and perfect for early cities.

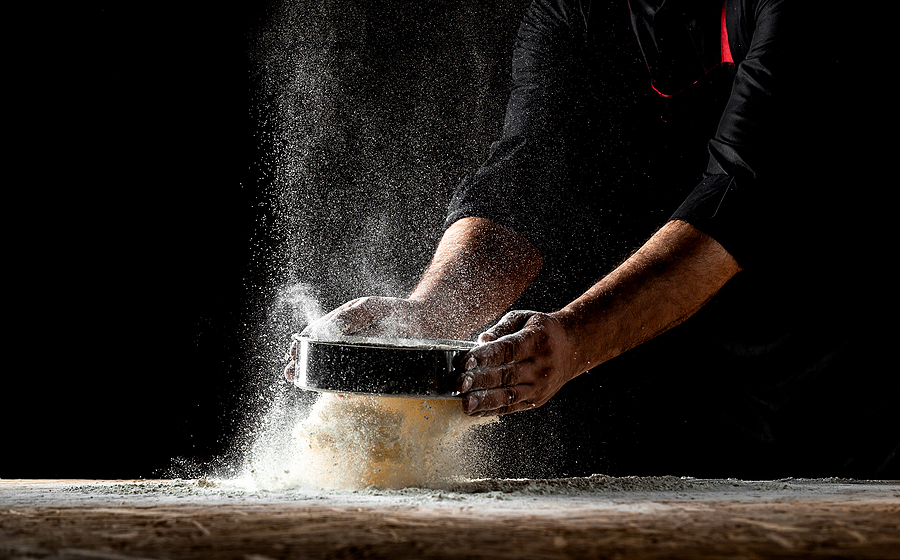
The trick was in the milling.

To make grain digestible, early societies learned to grind it using stones. Even 6,700 years ago, people were milling wheat between stones to remove the bran and germ, leaving the endosperm to become flour.

Early Innovations in Milling

  • Ancient Egyptians used saddle stones
  • Greeks developed hopper-fed “hourglass mills”
  • Romans introduced water power around 100 B.C.

Through the centuries, mills improved by harnessing new sources of energy — from humans and animals to windmills and waterwheels. Sifting systems became more advanced. By the 19th century, mills were adopting gears, belts, and roller systems to move grain faster and produce purer flour.

One key figure in this shift was American inventor Oliver Evans, who designed the first continuous milling system. His work introduced bucket elevators, screw conveyors, and sifters into a single seamless process — the first real automation of its kind.

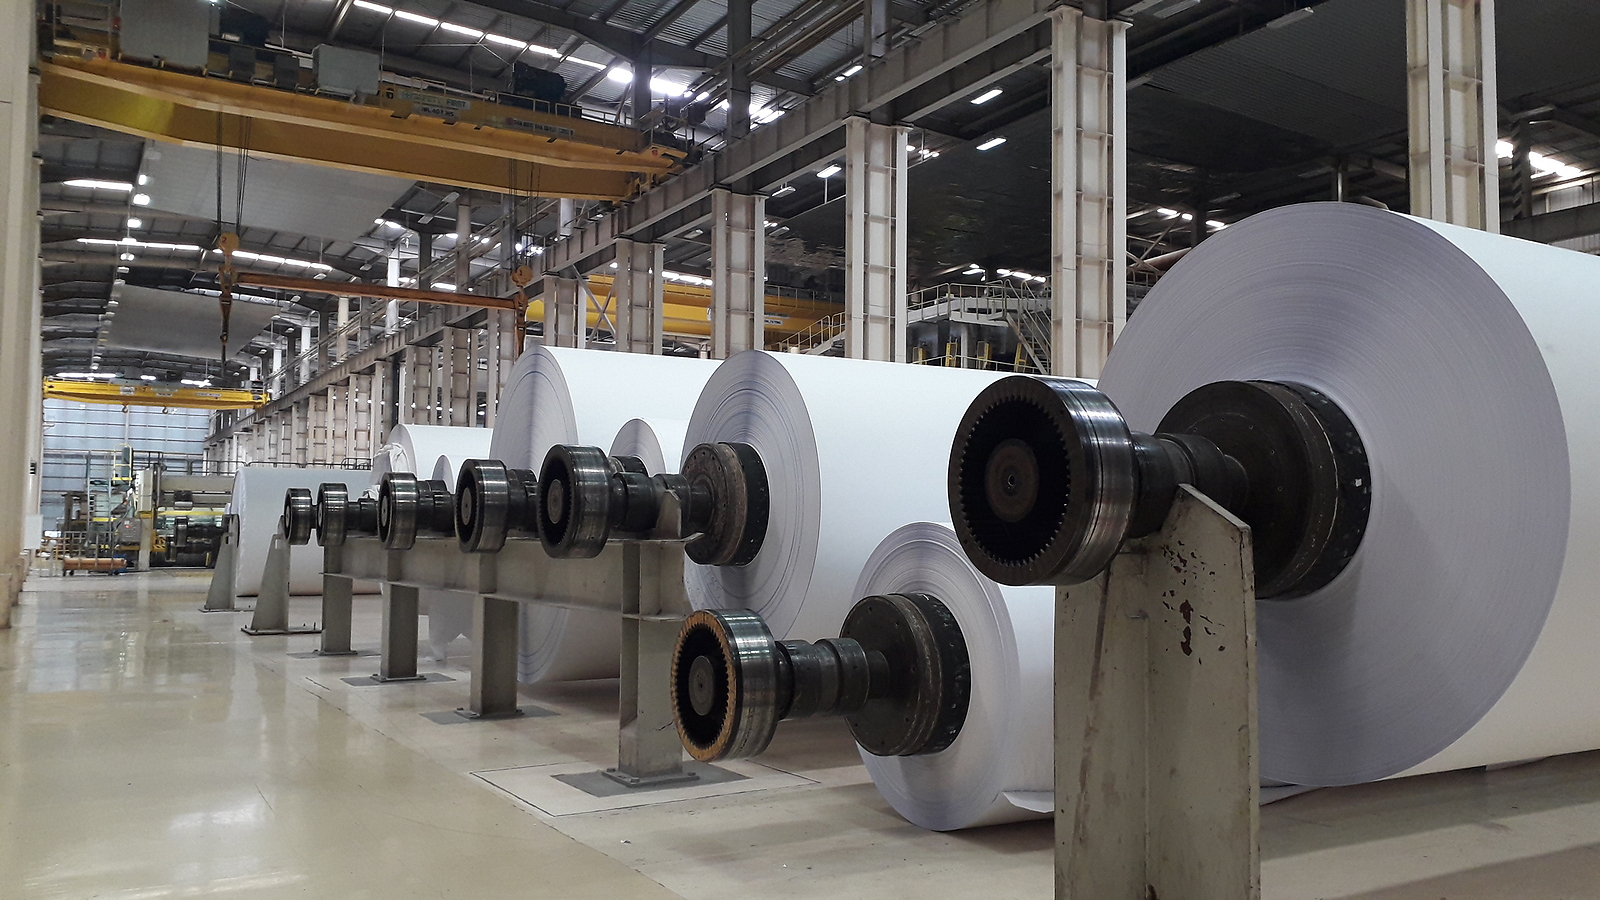
Milling Moves to the Midwest

As the U.S. expanded westward, so did its agricultural and industrial base. With new rail lines, barge access, and cheap land for growing wheat, the center of U.S. flour production migrated west.

By the late 1800s, Minneapolis had all the ingredients to become the new flour capital:

  • Proximity to wheat-growing regions
  • Reliable river power
  • Rapid rail expansion
  • A workforce hungry for opportunity

At the same time, a “New Process” of milling was changing the game. It used Canadian hard wheat, milled slowly between wider-spaced stones, to produce better flour more efficiently.

Edmund La Croix and the Minnesota Advantage

One of the biggest breakthroughs in modern milling came from Minnesotan Edmund La Croix, who invented the middlings purifier in 1865.

His innovation separated the finest parts of the wheat more effectively, dramatically improving flour quality. It helped Minneapolis mills produce flour that could compete with — and beat — European brands in quality.

By 1870, the average mill could extract 72% flour from grain, compared to just 28% in millfeed. Milling had officially become one of the first fully automated industries.

The Rise of the “Mill City”

By 1880, Minneapolis had overtaken St. Louis as the nation’s top flour producer. In that year alone, the city produced 2 million barrels. By 1910, that number had climbed to 15.4 million barrels, earning Minneapolis the title “Flour-Milling Capital of the World.”

World War I drove even more demand. In 1916, Minneapolis mills produced 18.5 million barrels, more than 20% of all U.S. flour.

Three companies dominated:

  • Washburn-Crosby (Gold Medal Flour)
  • Pillsbury
  • Northwestern Consolidated Milling

Pillsbury’s “A” Mill was the largest in the world, producing 12,000 barrels per day.

By 1928, Washburn-Crosby had become General Mills, and in 2001, it acquired Pillsbury — uniting Minnesota’s two biggest flour producers under one roof.

Flour Today: Global Competition, Local Legacy

While Minneapolis is no longer the flour capital, its influence remains. The ruins of the original Washburn Mill, destroyed in an explosion in 1878, still stand today near the Mill City Museum, complete with the iconic Gold Medal Flour sign.

Globally, countries like China, India, and Russia now lead wheat production. The U.S. ranks fourth in milled flour exports, behind Turkey, Kazakhstan, and Germany.

Want More?

If this article gave you something to chew on, check out our post on how fireworks are made. Or watch this video to see modern flour production in action.

Got a question about how something is made? Send it to the FlexTrades Writing Team and we’ll cover it in a future blog. 

April is the month of showers — we all know they bring May flowers. But have you ever thought about the showers that keep us smelling fresh all year round?

Roughly two out of three Americans shower every day. But it hasn’t always been that way.

The history of the modern shower is long, winding, and surprisingly global. From waterfalls to water heaters, here’s how we got here.

From Rivers to Rome: The Origins of Showering

Early humans cleaned themselves in streams, waterfalls, rain, and any natural water source they could find. As communities formed, the systems evolved.

  • The ancient Egyptians created ceramic jugs to mimic the feel of cascading water
  • The Greeks developed piping systems to move water where it was needed
  • The Romans brought the concept of hygiene to the masses, building public bathhouses across their empire

When Rome fell, the infrastructure crumbled with it. Medieval Europe lost access to Roman engineering, and the public bathhouse culture disappeared in many places.

Despite popular belief, hygiene didn’t vanish during the Dark Ages — but the systems that supported it did.

The Invention of the Shower

Fast forward to the 18th century, when interest in personal hygiene came back into focus. In 1767, William Feetham, a London stove maker, patented what is recognized as the first modern shower.

It wasn’t perfect.

  • It pumped cold water to a basin overhead
  • It dumped reused water on the user’s head
  • It wasn’t exactly refreshing

But it was a start.

By 1810, inventors added heated water. By 1850, modern plumbing was back in action — solving the whole “recycled water” issue and setting the stage for what we now recognize as a real shower.

Showers Gain Popularity

Throughout the 19th and early 20th centuries, showers grew in popularity, especially in England and the U.S. But the bathtub still reigned supreme until the 1980s, when showers took over as the go-to option in most households.

That’s when the customization boom began. Shower heads, body jets, built-in lighting — all became part of a new era in home design. The growth hasn’t stopped since.

The Shower Industry Today

The global market for bath and shower products is now worth nearly $50 billion a year.

It’s driven by more than just hygiene. Today’s consumers care about:

  • Efficiency – modern showerheads use significantly less water than bathtubs
  • Sustainability – water-saving technologies and eco-conscious materials
  • Experience – from rainfall heads to digital temperature control

In fact, a 10-minute shower today can use up to four times less water than a typical bath. That means getting clean doesn’t have to mean wasting water.

Curious for More?

If this kind of thing interests you, check out our post on the history of foundries to see how another everyday process evolved. Or, for something a little more modern, watch this video on how showerheads and hoses are mass-produced today.

And remember, the next time a question hits you in the shower, we’d love to help answer it. Send your ideas to writingteam@flextrades.com and we just might feature it in a future blog. 

Manufacturing sits at the intersection of science, technology, engineering, and math. It’s where ideas become tangible and precision meets production. But behind the machinery and the measurements is a set of principles that most of us first encountered in a middle school science class.

So today, let’s talk about something that sounds simple but plays a massive role in manufacturing: static electricity.

What Is an Atom, and Why Does It Matter?

To understand static electricity, we have to go all the way down to the atomic level.

Everything you can touch, build, or break is made of atoms. These atoms are made up of particles — protons, electrons, and neutrons — centered around a nucleus. Here’s the shorthand:

  • Protons have a positive charge
  • Electrons have a negative charge
  • Neutrons are, as the name suggests, neutral

In most materials, the number of protons and electrons is equal, so the object carries no electrical charge. But rub two materials together — especially ones with different conductive properties — and you disrupt that balance. Electrons jump from one surface to another, leaving one object more negative and the other more positive.

That imbalance? That’s static electricity.

Want to dig deeper into atomic structure? Start here.

Conductors vs. Insulators

Not all materials behave the same. Some let electrons move freely. Others don’t.

  • Conductors (like water and metal) have loosely bound electrons, making them ideal for electron transfer
  • Insulators (like rubber and plastic) hold electrons tightly, limiting their movement

This difference is critical in understanding how static electricity forms — and how it affects real-world environments.

The Balloon & Hair Trick

It’s a classic. You rub a balloon on your head and your hair starts to rise. But why?

Rubber is an insulator, so it doesn’t let electrons move easily across its surface. Hair, on the other hand, acts more like a conductor. When you rub the balloon on your head, electrons from your hair transfer to the balloon. The balloon now has more electrons (and becomes negatively charged), while your hair has fewer electrons (becoming relatively positive).

That difference in charge is static electricity. And it’s strong enough to pull your hair toward the balloon.

Fun? Sure. But in a manufacturing setting, it’s a different story.

Static Electricity in Manufacturing

Static electricity can be dangerous in a production environment. It’s not just an annoying zap. It’s a legitimate safety and quality risk.

Electrostatic discharge (ESD) — that tiny shock you sometimes feel when touching a doorknob — can do real damage. In manufacturing, ESD can:

  • Ignite flammable gases or vapors
  • Destroy sensitive electronic components
  • Attract dust and particles in cleanrooms
  • Cause materials to stick together or misalign

That’s why manufacturers go to great lengths to manage it.

How Manufacturers Manage Static Electricity

To minimize the risks of ESD, many facilities use specialized tools and processes, including:

  • ESD-safe clothing to reduce charge buildup
  • Antistatic wrist straps and grounding bracelets to safely redirect charges
  • ESD mats to neutralize static underfoot
  • Zero-charge hand lotions and cleaners to reduce friction on skin
  • Controlled humidity to reduce airborne electron movement

In highly controlled environments — especially in electronics manufacturing — these precautions aren’t optional. They’re essential.

Want to Learn More?

FlexTrades has a growing library of How It’s Made content that explores the science behind the trades. Check out more on our blog and see what else goes into the work behind the work.

PCBs are the beating heart of modern electronics. From your phone and your car to medical devices and defense systems, if it runs on electricity, it probably runs on a PCB.

The global printed circuit board market is projected to reach nearly $68.5 billion by 2025 with a 6.7% compound annual growth rate. That’s impressive growth, especially after the supply chain setbacks caused by COVID-19. So, how are these essential pieces of tech actually made?

Let’s walk through it.

What Are Printed Circuit Boards?

A Printed Circuit Board (PCB) is a board that connects and supports electronic components. But unlike older tech, PCBs do this without using traditional wires.

Instead, they rely on an organized system of pads, traces, capacitors, resistors, and more to move and regulate electrical current. It’s a clean, compact, and efficient way to bring electronics to life.

Before PCBs, electronics relied on point-to-point wiring. It worked, but it was bulky, unreliable, and prone to failure as insulation aged. The rise of cheaper, smaller electronics led directly to the widespread use of printed circuit boards.

Common PCB Components

  • Batteries – supply voltage to the circuit
  • Resistors – regulate electrical current
  • Capacitors – store electrical charge
  • Connectors – link devices together
  • Diodes – allow current to travel in only one direction
  • LEDs – diodes that emit light
  • Relays / Switches – control circuit flow
  • Transistors – amplify electric signals
  • Inductors – oppose sudden changes in current

PCB Terminology to Know

  • Pads – exposed metal areas where components are soldered
  • Paste Stencil – thin sheet that applies solder paste in exact spots
  • Surface Mount – components soldered directly onto the surface (today’s standard)
  • Through Hole – components with leads passed through drilled holes
  • Traces – copper paths that carry current
  • Solder – metal used to bond components and conduct electricity

Layers of a PCB

PCBs are made up of layers, each with a unique purpose. Together, they create a durable, functional platform for electronics.

  • Layer 1: Base Material – usually fiberglass, gives the board structure
  • Layer 2: Copper – laminated foil forms the conductive pathways
  • Layer 3: Solder Mask – protective green coating that insulates copper
  • Silkscreen – text and symbols printed for easier identification

Single-sided boards have one copper layer. Double-sided boards have two. Multi-layer boards can include many layers for more complex devices.

How PCBs Are Made

Here’s a high-level breakdown of the process:

  • Create the fiberglass base
  • Laminate copper layers
  • Etch away excess copper to leave traces
  • Apply the solder mask for insulation
  • Add silkscreen for labeling
  • You now have a blank board — time to populate it

How PCB Components Are Added

There are two main ways to populate a PCB:

Hand Soldering

SMT (Surface Mount Technology) Machine Operations

  • Boards move along a conveyor through multiple machines
  • Components are placed, soldered, inspected, and packaged
  • Ideal for large-scale production of less complex boards
  • See SMT machines at work here

Examples of PCBs

Blank Board – a clean, component-free circuit board, ready for population
Populated Board – a finished PCB with components mounted and soldered

For a visual of the full PCB manufacturing process, the team at FlexTrades recommends this industry resource and encourages you to dig deeper. 

Steel is everywhere. Look around.

Buildings. Bridges. Safety rails. Brackets. Cars. Trains. Sinks. Surgical tools. Jewelry. Even the scissors in your kitchen drawer.

It’s one of the most widely used materials on the planet, yet few people ever stop to ask the obvious question — where does steel actually come from?

Let’s walk through it.

Step 1: Turn Raw Materials into Molten Metal

It starts with iron ore, mined from the ground.

But iron ore on its own isn’t enough. It needs to be reduced, and that’s where coke comes in. Coke is created by crushing coal, then carburizing it at high temperatures in a furnace without oxygen. What you get is a carbon-rich, rock-like material that looks like small black chunks.

Add the coke, the iron ore, and some limestone to a blast furnace. That’s where the transformation happens.

Superheated air is blown into the base of the furnace, igniting a combustion reaction. The result? Molten pig iron. (Fun fact: it takes about 1.5 tons of iron ore to make just 1 ton of steel.)

The limestone helps remove impurities like silicon dioxide — the stuff you’d find in sand and rock.

Technically, pig iron isn’t quite iron or steel. But it’s the bridge between the two.

Step 2: Convert Pig Iron to Steel

Once the pig iron is molten, it’s transferred by ladle to another furnace.

There, it’s combined with scrap steel in one of two systems:

  • Basic oxygen furnaces, which blast high-pressure oxygen into the metal to burn off impurities
  • Electric arc furnaces (EAFs), which melt scrap instead of ore — a more sustainable method, though it can yield lower-grade steel

By this point, the transformation is complete. Molten steel is born.

Step 3: Shape It with Continuous Casting

Ladles transfer the molten steel into tundishes, which feed into a continuous caster.

The caster shapes the metal as it cools, forming it into things like:

  • Ingots
  • Blooms
  • Billets
  • Slabs

These are all known as semi-finished products — not ready for use, but ready for what comes next.

Step 4: Roll It Out

Next, the steel passes through rolling mills, where it’s processed into usable forms:

  • Steel plates
  • Coils
  • Rods
  • Bars

If the steel is rolled while hot, it’s called hot rolled steel. If it’s done after cooling, you get cold rolled steel, which is stronger and has a smoother finish.

Step 5: Final Touches

The last step is finishing.

Depending on the end use, that might include:

  • Pickling
  • Coating
  • Tinning
  • Annealing
  • Tempering
  • Cutting
  • Slitting
  • Coiling
  • Packing

Each of these changes the performance or appearance of the steel before it heads off to do its job in the world.

Want to see how it all works? Check out this video and article from the American Iron and Steel Institute.

Bonus Resources

If this kind of thing sparks your interest, FlexTrades has a whole archive of How It’s Made content. It’s worth the scroll. 

Let me take you back to my childhood living room. Picture it with me: a couch, a loveseat, a floor model television, a console table, and a lamp or two. Pretty standard. But one thing stood out. Sitting on the console shelf was a kaleidoscope. I’m not sure where my mom found it (or why she bought it), but I loved that thing. I’d pick it up, hold it to my eye, and slowly turn the end, mesmerized by the changing patterns and bursts of color. Back then, I thought it was magic. Now I know better—but it’s no less fascinating.

Kaleidoscope Components

Kaleidoscopes are built from simple components that come together in a surprisingly scientific way. At one end of the tube is an eyepiece, at the other, an end cap. Inside are two or three mirrors placed at precise angles to form a V or triangle. Most kaleidoscopes include small, everyday objects inside—beads, ribbons, bits of glass, buttons, or glitter—housed in thin transparent cells made of glass or plastic. The magic? It’s all in the angles and light.

Kaleidoscope Science

Here’s how it works. Light enters the kaleidoscope and travels in a straight line. When it hits a surface, it reflects. That reflection is where the visual show begins. Mirrors bounce light back and forth, while the objects scatter and refract that light in different directions. The result is a continuous, evolving display of color, shape, and symmetry. Think of it as a mini laser light show controlled entirely by what’s inside the tube—and your imagination.

Kaleidoscope Fun

Because the objects inside the kaleidoscope move freely, you’ll never see the same image twice. That’s part of the magic. Every slow twist of the end cap reveals a new scene, never to be repeated. So the next time you find one, take your time. Look closely. Rotate slowly. And take in the simple wonder of it all.

Want more articles like this? Check out FlexTrades’ blog for other interesting insights on how everyday things are made. 

From commuter sedans to long-haul trucks, tires are essential to everyday life. At FlexTrades, our skilled technicians travel across the country to support U.S. manufacturers — and many of them drive thousands of miles to reach their assignments. So when it comes to the reliability of tires, we don’t take it lightly.

In fact, we support several leading tire manufacturing clients nationwide, providing the talent that helps keep production lines rolling. That’s why, in this edition of How It’s Made, we’re exploring the process behind the rubber that meets the road.

Tire Materials

Tire manufacturing starts with a mix of natural and synthetic materials, blended for strength, flexibility, and durability.

  • Natural Rubber
  • Synthetic Rubber / Polymers
  • Steel Wire: Used in belts, beads, and truck tire plies
  • Textile Cords: Provide structural support within plies
  • Fillers: Carbon black and silica, used to reinforce rubber during the Banbury mixing process
  • Antioxidants & Antiozonants: Protect the rubber from heat, oxygen, and ozone damage
  • Curing Additives: Sulfur and zinc oxide, key ingredients during vulcanization

Rubber Manufacturing Process

There are three key operations used to prepare rubber for tire building:

  • Banbury Mixing: Raw and synthetic rubbers are mixed with fillers under heat and pressure to form solid, workable rubber
  • Extruding: Shapes the rubber into usable forms
  • Calendering: Layers rubber with fabric or steel to create belts, plies, and edge covers

Once processed, the material is cut, sheared, spliced, or shaped to exact specifications — ready for tire construction.

Tire Components

Every tire is made of multiple layers, each with a specific purpose:

  • Innerliner: Keeps air sealed inside the tire
  • Plies: Provide strength and hold air pressure
  • Bead: Ensures an airtight seal with the wheel
  • Sidewall: Protects the structure from road and curb damage
  • Belts: Add strength to the tread and improve performance
  • Tread: Provides grip, traction, and durability

How Tires Are Made

The tire-building process happens in two stages on highly specialized machinery, such as:

  • Tire Building Machine (TBM)
  • Tire Assembly Machine (TAM)
  • Tire Forming Machine (TFM)
  • 1st and 2nd Stage Machines

These may be manually operated or fully automated depending on the facility.

Stage One: Casing Building

This step forms the base structure of the tire — also called the carcass. It includes:

  • Wrapping the innerliner onto the drum
  • Layering body plies over the innerliner
  • Placing the beads at each side
  • Inflating the drum bladder to shape the plies over the beads
  • Adding and pressing sidewalls into place

Stage Two: Tread & Belts Application

The carcass moves to a second machine where steel belts and tread are added. At this point, it’s known as a green tire — shaped but not yet cured or hardened.

Curing the Tire

The green tire is placed into a curing mold, which functions like a large clamshell. A bladder inside the mold inflates with steam, pressing the rubber into the mold to form the tread pattern and sidewall lettering.

  • Passenger tires cure for 10–15 minutes at 300°F
  • Heavy-duty or off-road tires may cure for 24 hours

Once cured, the tire is cooled on a Post-Cure Inflator (PCI) to stabilize its shape before inspection.

Inspection & Testing

Every tire undergoes strict quality control to ensure safety and performance.

  • Tire Uniformity Testing: Measures balance and roundness under simulated road conditions
  • X-Ray Testing: Detects internal flaws
  • Destructive Testing: Verifies structural limits under extreme stress

After passing all inspections, the tire is ready for the road.

For a closer look, watch this Tire Manufacturing Video. And if you’re curious about tire care, check out our article on safe driving and tire maintenance.

Safe travels! 

In Minnesota, we like to say we have 11 seasons — not four. They are:

  • Winter
  • Fool’s Spring
  • Second Winter
  • Spring of Deception
  • Third Winter
  • Mud Season
  • Actual Spring
  • Summer
  • False Fall
  • Second Summer
  • Actual Fall

Right now, we’re somewhere between Actual Spring and Summer, which means shelves are stocked with bug spray, sunglasses, and (of course) sunscreen. That got us thinking… how is sunscreen made?

Let’s break it down in this month’s How It’s Made feature.

What Does Sunscreen Do?

The sun emits three types of light: infrared, visible, and ultraviolet (UV). UV light is the most harmful to humans. There are two types of UV rays:

  • UVA: Can penetrate deep into the skin, damaging cells and the immune system
  • UVB: Can burn the outer skin and contribute to skin cancer

Sunscreen helps by either blocking UV rays or absorbing them before they penetrate the skin. To do this, sunscreen includes active ingredients such as:

  • Titanium Dioxide
  • Zinc Oxide
  • Avobenzone
  • Octisalate
  • Oxybenzone
  • Homosalate

These are mixed with liquids (like purified water), functional agents (emulsifiers, stabilizers), and skin-nourishing ingredients like Vitamin E.

Here’s a graph showing the ingredient percentages typically found in sunscreen.

Four Steps to Making Sunscreen

Step 1: Purify the Water

Sunscreen starts with reverse osmosis purification to ensure clean, contaminant-free water.

Step 2: Mix the Ingredients

Solids, powders, and flakes are added to large kettles or vats with purified water. Recipes outline exact measurements, time, temperature, and mixing speed.

Curious how similar this process is to other manufacturing operations? Check out our past articles:

Step 3: Transfer to Stainless Steel Tanks

Once mixed, the formula is pumped through sanitary piping into 1,000-gallon tanks inside sterile rooms.

Step 4: Fill & Package

From these tanks, sunscreen flows into pressurized filling machines via more stainless piping.

  • Bottles are fed in by conveyor
  • Nozzles fill, cap, and seal each bottle automatically
  • Products are then boxed, palletized, wrapped, and shipped

Choosing the Right Sunscreen

Manufacturing it may be straightforward. Buying it? Not always.

If you’re standing in the sunscreen aisle unsure what to choose, you’re not alone.
Here are two great resources:

And remember — no matter how many “seasons” your state has, wear sunscreen year-round.

Happy (and SAFE) Sunning! 

We hear about “going paperless” all the time — a byproduct of technological advancement. And while digital workflows are growing, paper remains an essential part of modern life. From packaging and printing to hygiene and education, its uses are vast and vital.

But paper isn’t new. In fact, many historians agree it was invented in China around 105 BC — making it a true innovation of the ancient world. In this edition of How It’s Made, we’re diving into the modern papermaking process.

Step 1: Logging & Cutting

It all begins with trees — mostly fast-growing evergreen species. That said, more and more manufacturers now use renewable fibers like cotton, bamboo, hemp, and jute to reduce environmental impact.

At the logging site, harvested trees are debarked and processed into wood chips using heavy-duty machinery. Check out the debarking and chipping process here!

Those wood chips are then transported to a paper mill for processing.

Step 2: Pulping

Pulping breaks down wood fibers and separates out the components needed to form paper. There are two primary methods:

  • Chemical Pulping: Used for high-strength products like containers, paper bags, and writing paper, this method cooks the chips in a solution of sodium hydroxide and sodium sulfide under high pressure (sulfate/kraft process). This removes lignin, sugars, and other impurities to form a fiber-rich slurry, which is then washed, bleached, and screened.
  • Mechanical Pulping: Commonly used for newspapers, paper towels, and tissues, this method grinds wood chips using rotating discs — no pressure or heat required. The resulting mixture is also diluted into a slurry and further cleaned for processing.

Step 3: Beating

The pulp slurry is then sent to a beating vat, where it’s pounded and refined. Here, filler materials like chalk, clay, or specialty chemicals are added to control texture, weight, and opacity — all tailored to the intended final use of the paper.

Step 4: Drying

The slurry still contains lots of water — and that moisture needs to go. First, it’s sprayed onto mesh screens to form a wet mat. Then, it’s pressed through industrial rollers to remove about 50% of the water. After pressing, the mats are heated and dried further, bringing total water removal to 90-95%.

Step 5: Rolling

At this stage, the paper is nearly finished. Depending on its end use, additional treatments may be applied. Finally, the dried sheets are fed through industrial rolling machines, creating large paper rolls for use in manufacturing and converting.

Want to see the scale of this operation? Check out this full paper mill tour!

And if you’re interested in sustainability, don’t miss our How It’s Made article on recycling — also on the FlexTrades blog.  

March is a big month for meat lovers. In the UK, it’s SPAM® Appreciation Week. In the U.S., we celebrate National Deli Meat Month — and what better way to join the fun than by demystifying one of the most iconic canned meats ever made?

In this edition of How It’s Made, we’re taking a closer look at SPAM® — what it is, how it’s made, and why it’s still flying off shelves after more than 85 years.

SPAM® Facts You Might Not Know

  • SPAM® is produced by Hormel Foods, which has sold over 8 billion cans since 1937 — in 44 countries.
  • The name came from a naming contest. The winner received $100. No one truly knows if it stands for “spiced ham,” “shoulder of pork and ham,” or something else.
  • Originally popular with U.S. troops during WWII, SPAM® was used to lubricate guns and grease boots, not just for meals.
  • Today, three cans are sold every second worldwide.
  • SPAM® is found in one out of three American households.
  • Guam and Hawaii are among the biggest consumers per capita — in Guam, the average person eats 16 cans per year.
  • In South Korea, SPAM® is often considered a luxury gift.
  • McDonald’s in Guam serves it on the menu.

And for us Minnesotans? SPAM® is a point of pride — Hormel was founded right here in 1891.

How SPAM® Is Made

SPAM® was born when Jay Hormel saw a butcher slicing canned meat at a deli and thought: “What if consumers could skip the butcher and slice it themselves at home?” The result was a shelf-stable, high-protein product that didn’t require refrigeration — a game-changer for American kitchens.

The Ingredients (Yes, Only Six)

  • Ground pork mixed with ground ham
  • Salt
  • Water
  • Sugar
  • Sodium nitrite
  • Potato starch (added in 2009)

Most of the pork used is pork shoulder — a cut that was once hard to process for other purposes. Sodium nitrite acts as a preservative, preventing bacterial growth and creating SPAM’s signature pink hue. Potato starch, added decades later, helps bind the meat and retain moisture while cooking.

Manufacturing Process

Creating SPAM® might be simple on paper — but the process is a high-volume, precision operation:

  • Hand carve and grind the meat in 8,000-pound batches at controlled temperatures (approx. 20 minutes).
  • Use a vacuum mixing machine to super cool the meat.
  • Add remaining ingredients and blend.
  • Funnel the mixture into cans, vacuum seal, and apply labels.
  • Cook the cans using hydrostatic cookers (steam + pressure) — up to 33,000 cans per hour!
  • Package and palletize for global shipment.

Six ingredients. Six steps. No mystery.

Give It a Try

Never tried SPAM®? As a proud Minnesotan, I think you should.

Grab a can at your local store and give it a go. Fry it, bake it, or turn it into SPAM sushi (yes, it’s a thing). Pair it with cheese (and check out this article on how cheese is made) for the full experience.

Happy Eating — and Happy National Deli Meat Month!